NS8Z76XBFPFD
Photoshop is a handy tool when it’s come to photo editing. Creating a gradient image for a website background in Photoshop is easy. You just need to define the starting and ending point in an image to create a gradient of two or multiple colors. Here are the steps to make a simple gradient image for your website.
1. Go to the File menu and click New.

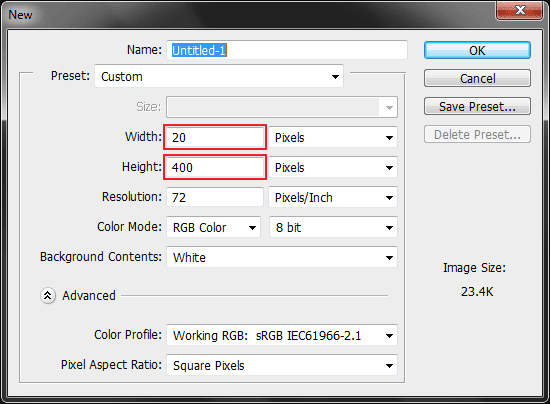
2. Specify the Height and Width for an image and click Ok.
3. In the menu bar, click Layer > New > Layer.

4. In the RGB Color Panel, Select the Foreground and Background Color.
Note: If the RGB Color Panel isn’t visible, click on the Window > Color.

5. Now click on the Gradient Tool and select the Gradient Type. You can apply different types of gradient in Photoshop such as Linear, Radial, Angle, Reflected and Diamond. But, for this tutorial we’re using linear gradient.

6. In the image, place the pointer to the starting point (where you want to apply the gradient from), and drag your cursor till the ending point, while dragging hold the shift key to make the line straight.


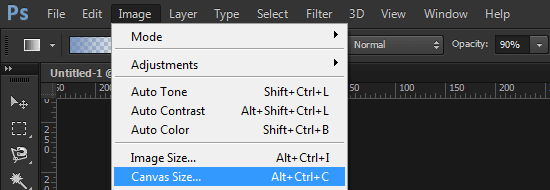
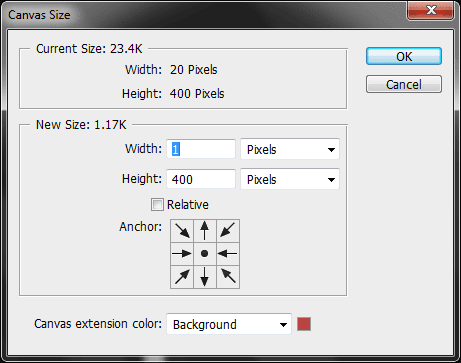
7. Now let’s move to the the part of saving few KBs or Bytes, to reduce the size of an image (that may help your site load faster) go to the Image > Canvas Size and make the width to 1px (because it will be repeated horizontally) then click Ok.
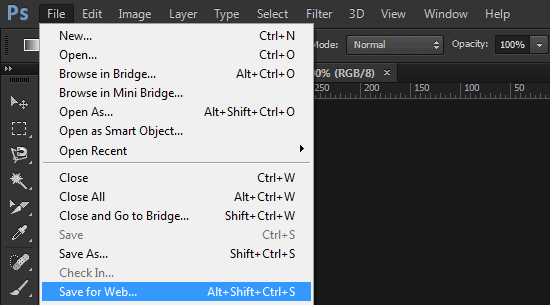
8. When you finish editing, go to the File menu and click Save for Web.
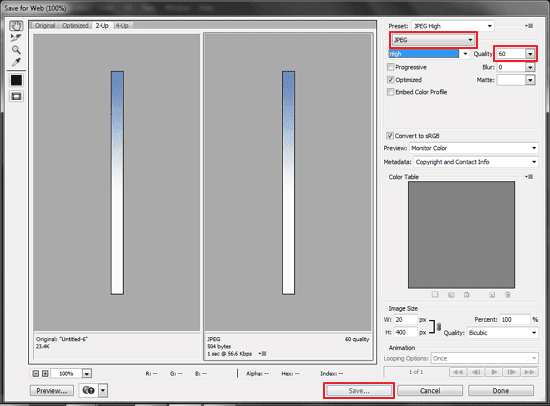
9. In the Save for Web dialog box, select the file format as JPEG and set the Quality to High (60) or Very High (90) then hit Save.
Tip
Photoshop is a handy tool when it’s come to photo editing. Creating a gradient image for a website background in Photoshop is easy. You just need to define the starting and ending point in an image to create a gradient of two or multiple colors. Here are the steps to make a simple gradient image for your website.

2. Specify the Height and Width for an image and click Ok.

3. In the menu bar, click Layer > New > Layer.

4. In the RGB Color Panel, Select the Foreground and Background Color.
Note: If the RGB Color Panel isn’t visible, click on the Window > Color.

5. Now click on the Gradient Tool and select the Gradient Type. You can apply different types of gradient in Photoshop such as Linear, Radial, Angle, Reflected and Diamond. But, for this tutorial we’re using linear gradient.

6. In the image, place the pointer to the starting point (where you want to apply the gradient from), and drag your cursor till the ending point, while dragging hold the shift key to make the line straight.


7. Now let’s move to the the part of saving few KBs or Bytes, to reduce the size of an image (that may help your site load faster) go to the Image > Canvas Size and make the width to 1px (because it will be repeated horizontally) then click Ok.


8. When you finish editing, go to the File menu and click Save for Web.

9. In the Save for Web dialog box, select the file format as JPEG and set the Quality to High (60) or Very High (90) then hit Save.

Tip
- You can also use Presets or your own custom version of that to make the gradient of two or multiple colors, for this click on the gradient editor on the left side of the Linear Gradient.

